
iPhone background-removal guide
Remove a Background and Add Text on iPhone
Remove BG & Eraser lets you remove a photo background, position the cutout and add text in the same editor. Customize fonts, styles, colors and text backgrounds, then export the finished image.
Remove BG & Eraser includes 3 free exports and an optional one-time Lifetime Unlock. No subscription.
Start with one message and one subject
A cutout and a short piece of text can be enough for a social graphic, announcement, simple product visual or label. Decide what the viewer needs to understand first: the subject in the photo, the message or the relationship between them. That choice guides the arrangement.
Keep the text focused. A short title or label leaves more room for the subject and is easier to read at small sizes. If the message requires several paragraphs or a complex layout, reconsider whether a single image is the right place for all of it. This workflow is for a simple composition built around your photo.
1. Remove the photo background
Choose a photo in Remove BG & Eraser and let automatic removal create the cutout. Start with a source where the subject and important details are visible. The removal step clears away the original setting so you can arrange the subject with text against a background you choose.
Check the overall silhouette before composing the image. Restore a missing part of the subject and erase unwanted remnants of the original background. The magnifier helps with small adjustments, especially around hair, fingers and clothing edges.
2. Choose a background that leaves the message readable
Remove BG supports white or another solid color, a gradient, transparency and your own photo as a background. For a simple announcement or label, a solid color can give both the cutout and the words a quieter setting.
A gradient can also work, but inspect the area behind every part of the text. With a photo background, look for a place where the words do not compete with busy detail. A text background is another supported styling option when the message needs clearer separation.
If you intend to reuse the composition elsewhere, consider transparency and PNG export. Text colors that look clear against the editor's current surroundings may become hard to read on a different destination background. Choose the output based on where the image will actually be seen.
3. Position the subject before adding the final text
Move, resize and rotate the extracted subject to leave space for the message. Avoid pushing important details against the image boundary. If the subject is meant to draw attention first, give it enough room that it remains recognizable at the final viewing size.
Think about the text area as part of the composition from the start. Placing a large subject in the center can leave only narrow gaps for the words. A smaller or shifted cutout may give the image a clearer balance without requiring a longer message or more decoration.
4. Add and customize the text
Add your text in the editor, then use the supported font, style, color and text-background options to make it readable. Choose a font and style that fit the message while remaining clear at the size where the graphic will be used.
Check contrast between the words and the chosen background. Pale text on a pale gradient or dark text on a detailed photograph may be difficult to read. Adjust the text color or its background rather than relying only on the surrounding image to make the message clear.
Review the wording as well as its appearance. Check spelling, names and any numbers before export. A visually balanced image can still fail its purpose if the label is ambiguous or the announcement contains a mistake.
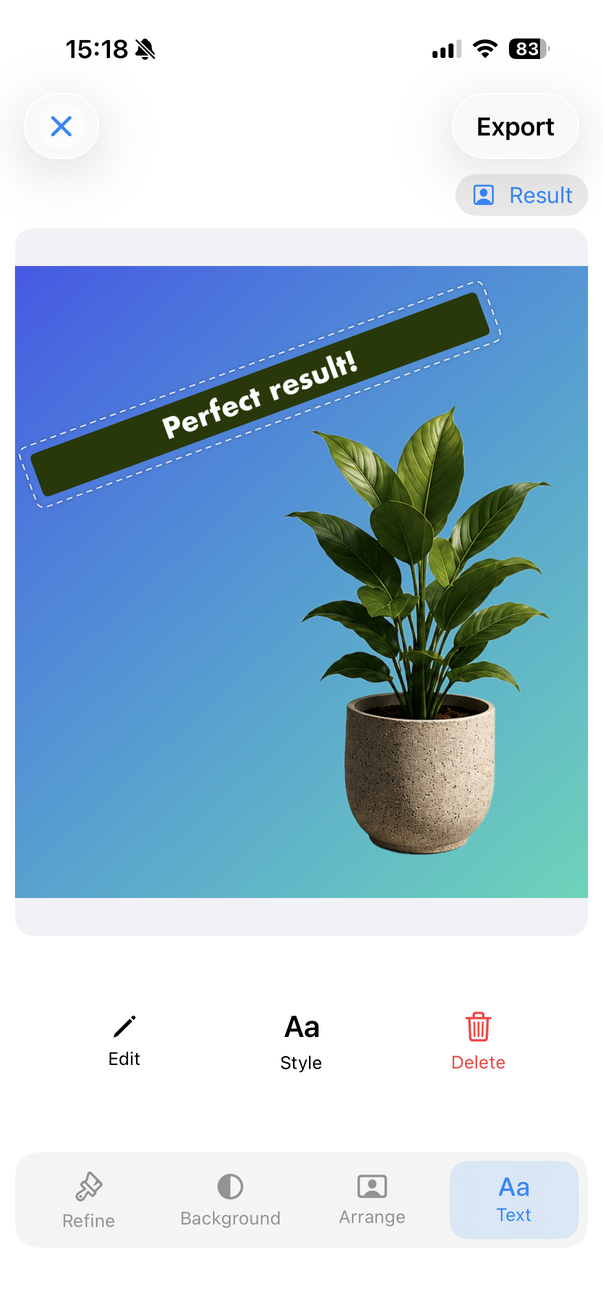
5. Review the cutout and words together
Look at the complete image at a normal viewing size. Can you read the message quickly? Is the subject still visible? Does any part of the text sit too close to an important detail? Make composition and styling adjustments based on the whole result.
Then check the cutout edges against the final background. A fringe that was hard to see earlier may be obvious after you change the color or add a photo. Use erase and restore for local correction, and keep the outline natural. Manual refinement can improve the result without guaranteeing perfect separation of fine hair or transparent material.
Export a simple finished visual
Confirm the final background choice and export when the image is ready. If you need a transparent result, leave the background transparent and use PNG. If the composition depends on a particular solid color, gradient or photo, keep that replacement in the finished image.
Remove BG & Eraser includes 3 free exports and an optional one-time Lifetime Unlock for unlimited use, with no subscription. Background removal and editing happen on-device and no Remove BG account is required.
The app's documented text controls support this photo-led workflow. This guide does not assume templates, advanced page layout or a full graphic-design suite. For the earlier steps, the related guides explain choosing a cutout and replacing its background before the text is added.
Related workflows
Try the workflow on your iPhone
Remove backgrounds automatically, refine the cutout and export or replace the background with Remove BG & Eraser.

3 free exports. Optional one-time Lifetime Unlock. No subscription.