
iPhone background-removal guide
How to Change a Photo Background on iPhone
Remove the original background in Remove BG & Eraser, then choose a solid color, gradient or another photo. Refine the cutout, adjust its position, size and rotation, and export the completed composition.
Remove BG & Eraser includes 3 free exports and an optional one-time Lifetime Unlock. No subscription.
Decide what the replacement should do
A new background changes the setting around the subject while keeping the extracted subject from your original photo. Before editing, decide whether you need a simple backdrop, a bit of color or a specific scene. That decision helps you choose a background and judge whether the result works.
A solid color keeps the composition simple. A gradient adds variation without introducing another detailed image. Your own photo can provide a different setting, but it also asks more of the cutout: a visible edge or a mismatch in lighting may become easier to notice.
1. Create the subject cutout
Choose the original photo in Remove BG & Eraser and let the app remove its background automatically. Start with an image where the subject is visible and its outline can be judged. A replacement background cannot recover part of a person or object that was hidden or outside the source image.
Check the overall silhouette before arranging it. Confirm that useful details remain and that unwanted parts of the original setting have been removed. If you plan to use a darker replacement, be especially alert to pale remnants of the original background around the subject.
2. Choose a solid color, gradient or photo
Use a solid color when the subject and any text need a quiet backdrop. White is one supported choice, but another color may separate the subject more clearly. Consider how both bright and dark parts of the cutout look against the color.
Choose a gradient when you want a background with some variation. Check that the subject stays visible across the parts of the gradient it touches. An outline that looks clear on one side can become hard to read where the background gets lighter or darker.
For a photo background, use your own image as the replacement. Look for a composition with space for the subject. A busy image can compete with the cutout, while a quieter area can give it a more readable placement. The app supplies the replacement and positioning workflow; it does not automatically reconcile every difference between two source photos.
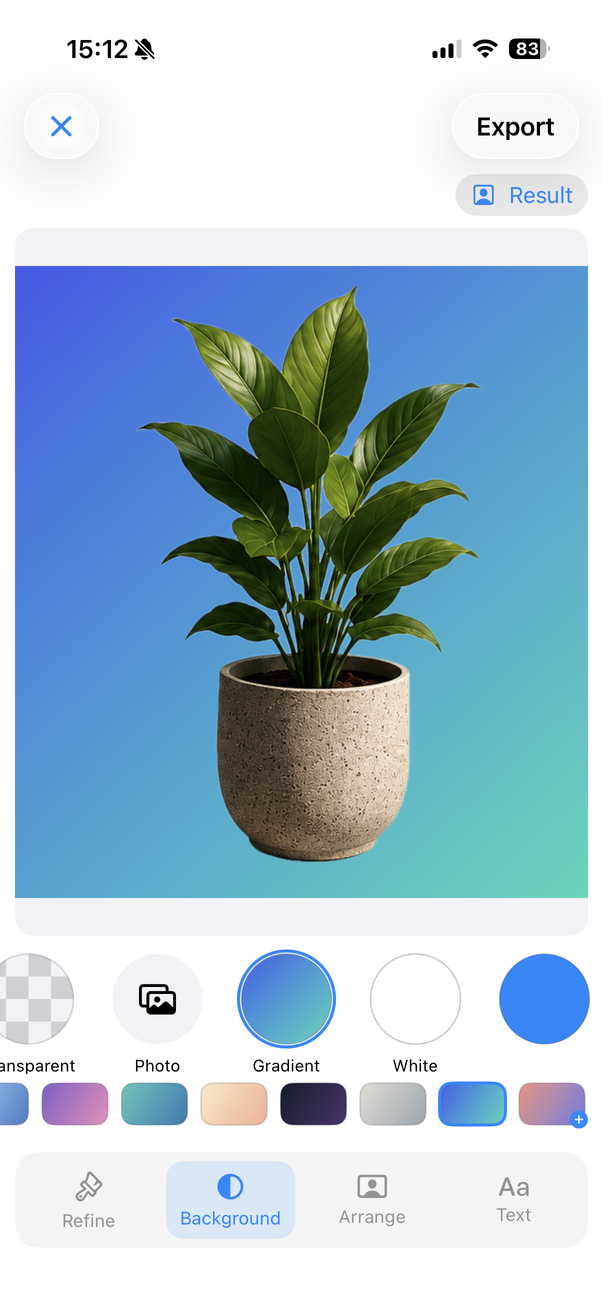
3. Arrange the subject in the new composition
Move, resize and rotate the extracted subject to fit the replacement. Think about where the viewer should look first and whether the subject has enough space around it. Check that the new placement does not cut off a hand, hair or an important part of an object.
With a photo background, compare the apparent size and angle of the subject with its surroundings. A small adjustment can make a composition easier to read, but positioning alone cannot change the lighting or perspective captured in the original photo. Choose compatible source images when a believable setting matters.
4. Refine edges against the chosen background
The new background is a useful test surface. Inspect the cutout where it meets a contrasting area of the replacement. Look for a fringe of the original surroundings, holes in the subject or details that were mistakenly removed.
Use erase to clear unwanted remnants and restore to bring back missing subject details. The magnifier supports closer manual work. Make small corrections and then check the whole composition so the edge does not become visibly harsher than the rest of the image.
Hair and fine or transparent material can be difficult because the original background may show through them. Manual refinement can improve a result, but it does not guarantee perfect separation. If the two images still clash, a simpler replacement background may give you a more useful finished image.
5. Review and export the finished image
Review the image at the size where it will be seen. Confirm that the background is intentional, the subject remains readable and no unwanted fragments sit around the outline. If you are also adding text, leave room for it before you finalize the placement.
Export when the composition is ready. Remove BG & Eraser includes 3 free exports, followed by an optional one-time Lifetime Unlock for unlimited use. There is no subscription. Background removal and editing happen on-device, without requiring a Remove BG account.
When should you keep transparency instead?
If you have not chosen a final setting, leave the background transparent and export a PNG. This lets a later layout supply the background. If you already know the intended scene or color, finishing the replacement in Remove BG keeps the removal and composition steps together.
The same basic cutout can support different goals, but review its edges against the background you actually intend to use. A cutout that looks fine on white may need another pass on a dark photograph. Start with the related guides if you need help with the original removal, a white finish or more careful manual correction.
Related workflows
Try the workflow on your iPhone
Remove backgrounds automatically, refine the cutout and export or replace the background with Remove BG & Eraser.

3 free exports. Optional one-time Lifetime Unlock. No subscription.