
iPhone background-removal guide
How to Make a Transparent PNG on iPhone
Remove BG & Eraser can export a transparent PNG. Remove the photo background, refine the subject, leave the background transparent and export the finished cutout as PNG.
Remove BG & Eraser includes 3 free exports and an optional one-time Lifetime Unlock. No subscription.
What makes the image transparent?
A transparent cutout keeps the subject while allowing the area around it to show whatever is behind the image. A white background is different: it remains a white rectangle when you place the image on a colored layout. If you want the subject to fit into several different designs, that distinction matters.
PNG can preserve transparency, but choosing a PNG file alone does not remove a background. You still need to separate the subject from the original photo and keep the surrounding area transparent. This guide focuses on that editing workflow rather than converting an existing opaque image between file formats.
1. Remove the original photo background
Choose the image in Remove BG & Eraser and let the app create the initial cutout automatically. Decide which parts belong to the subject before you start correcting the result. An accessory, handle or loose piece of clothing may be important even if it is separated from the main outline.
Check the whole image first. If part of the original background remains attached, a transparent export will preserve that leftover area too. If a piece of the subject is missing, saving as PNG will not bring it back. Correcting the cutout comes before choosing the final export.
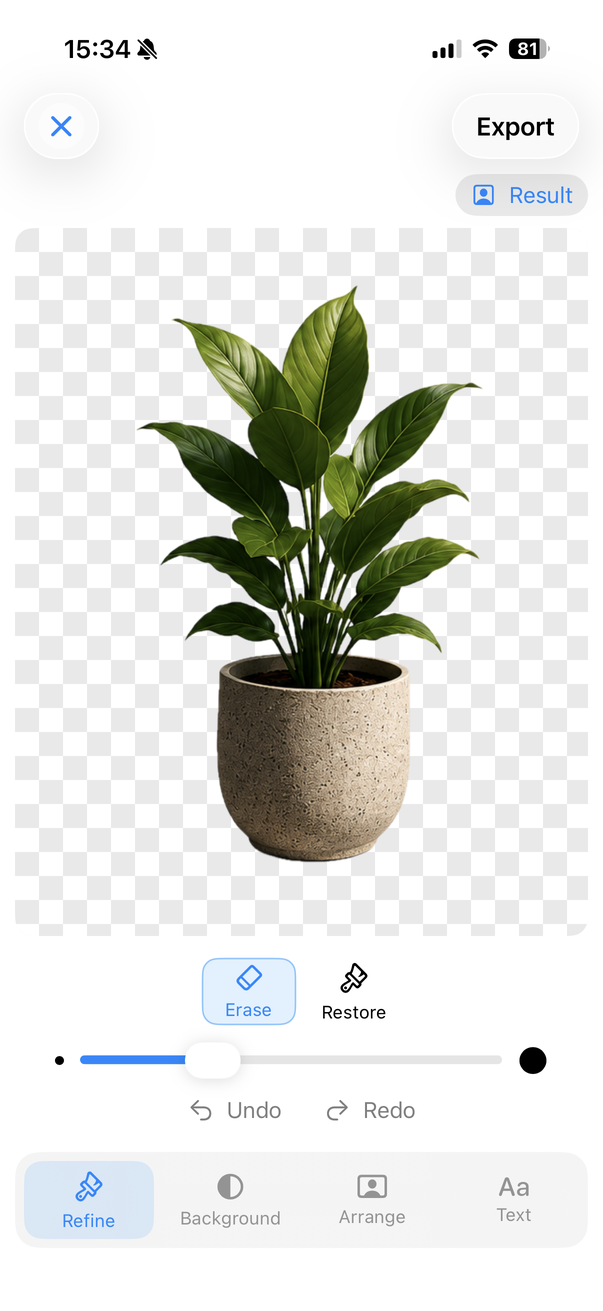
2. Check edges and gaps inside the subject
Inspect the outside boundary and the spaces within it. Gaps between fingers, around a handle or between an arm and the body should show the new background where appropriate. These small areas can look acceptable in the editor yet become obvious when the cutout is placed elsewhere.
Use erase for unwanted remnants and restore for parts of the subject that need to return. The magnifier helps with smaller adjustments. For fine hair or soft fabric, avoid making the boundary so hard that it no longer resembles the original photo.
A temporary solid background can help you inspect the outline. Look at it against both a lighter and a darker color if you expect to use it in different contexts. After inspection, return the background to transparency before exporting. The temporary checking color must not become part of the final image.
3. Keep the background transparent and export PNG
Choose transparency as the final background and export the cutout as PNG. Do not choose white or another solid color if your goal is a reusable transparent image. A color behind the subject creates a finished composition instead of leaving the surrounding area open.
Before exporting, check the subject position and the space around it. Remove BG supports moving, resizing and rotating the subject, so consider how the cutout will fit in its next destination. Leave enough room that a hand, hair strand or object edge is not lost at the boundary of your composition.
The app includes 3 free exports. The optional one-time Lifetime Unlock provides unlimited use without a subscription. Review the outline and background choice before committing an export, especially when you are using one of those initial free exports.
Where is a transparent cutout useful?
A transparent subject can sit on a presentation slide without covering the slide color with the old photo background. It can also be placed on a social graphic, an announcement or a simple product composition where text and a new background already exist.
Choose transparency when you need flexibility. Choose a replacement background when you already know how the finished image should look. For example, an image intended for a plain listing may be easier to finish with white in the app, while a subject destined for several layouts benefits from staying transparent.
Transparency does not improve the original photo's sharpness or recover hidden details. It changes which areas of the image are visible. Start with a clear source and inspect the cutout rather than relying on the file format to fix an editing problem.
Why does my transparent image look white?
An image viewer may display transparency against a white surface. That appearance alone does not tell you whether the file contains a white background. A more useful check is to place the exported PNG over a colored background in a destination that supports transparent images.
If a white rectangle remains around the subject there, recheck that you exported with transparency selected. Also check whether the destination altered the image after import. Keep the PNG you exported as the reference when comparing the result across apps.
For a rough outline or a fringe of the old background, return to manual refinement. Those are cutout issues, separate from how a viewer displays transparency. The related guides cover the initial removal workflow and ways to check difficult edges before the final export.
Related workflows
Try the workflow on your iPhone
Remove backgrounds automatically, refine the cutout and export or replace the background with Remove BG & Eraser.

3 free exports. Optional one-time Lifetime Unlock. No subscription.