
iPhone background-removal guide
How to Make a Photo Background White on iPhone
In Remove BG & Eraser, remove the original background, select white as the replacement, check the subject edges and export the finished image. You can adjust the cutout’s position, size and rotation before saving.
Remove BG & Eraser includes 3 free exports and an optional one-time Lifetime Unlock. No subscription.
Choose white when you want a finished image
A white background gives the subject a simple setting without the surroundings of the original photo. It can be useful for a product photo, profile image, listing or another image where you want attention to stay on the subject. The result contains a white background rather than a transparent area.
Start by deciding how the image will be used. A small profile image needs a readable subject at a small size. A product listing may need space around the whole object. These are composition decisions you can make while editing; they do not mean the app certifies an image for a particular platform or document requirement.
1. Pick a source with visible subject details
Choose a photo where the subject is fully visible and reasonably sharp. Compare the edge of the object or person with the original background. A clearer boundary makes it easier to review the automatic result and decide what to erase or restore.
White does not fix blur, hide damage to the subject or reveal a part that was outside the original photo. If the source cuts off an important detail, consider using another image before spending time refining it. Keep pale clothing and bright objects in mind: they can blend into the white background you are about to add.
2. Remove the original background
Open the photo in Remove BG & Eraser and let automatic background removal create the initial cutout. Check whether the complete subject remains and whether any original surroundings are still attached. Pay attention to gaps, handles, straps and spaces between fingers.
Use the automatic result as a starting point. A subject that stands out from its surroundings may need only a quick check. A busy original background or a soft boundary may need manual work before it looks convincing on white.
3. Replace the background with white
Select white as the new background. Remove BG supports white and other solid colors, gradients, transparency and another photo. For this workflow, a plain white choice keeps the composition focused and makes remaining dark fragments easier to notice.
Do not leave the background transparent if your intended result is an image with white behind the subject. Transparency may merely appear white in a viewer. Selecting an actual white background makes white part of the composition, so the image carries that setting with it.
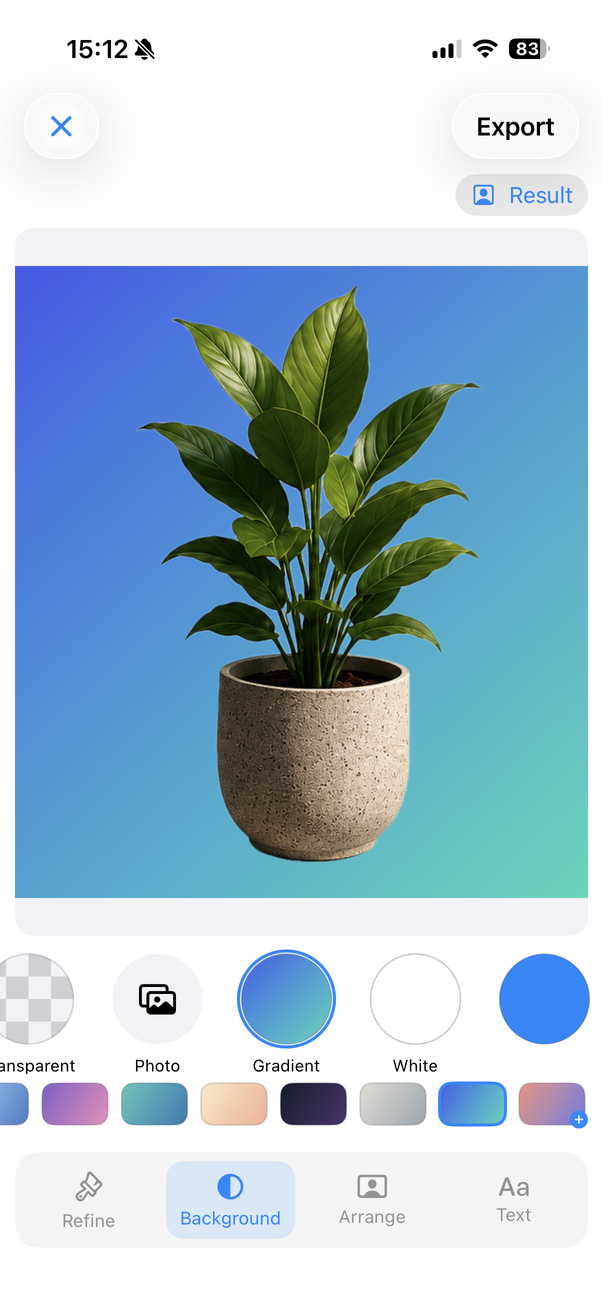
The White option is visible here. The preview still uses Gradient; it is not a white-background result.
4. Refine the boundary on both light and dark backgrounds
Look closely at the outline on white. Dark remnants of the original background may show up as small marks or a fringe. Use erase to remove those unwanted pieces. If a part of the subject has disappeared, use restore and check that you have not brought back surrounding pixels as well.
The magnifier helps you judge small details while editing. A light subject can be difficult to inspect against white, so temporarily try a darker solid color to see the outline more clearly. Return to white when you have finished checking.
Hair, fine fabric and blurred edges can remain difficult even after correction. Avoid stripping away all softness merely to make the outline sharper. A natural-looking boundary at the final viewing size is a more useful goal than trying to make every small detail look identical against every background.
5. Position the subject and export
Move, resize or rotate the cutout to suit the composition. Leave enough room around the subject so important details do not touch the image boundary. Compare the top, bottom and side spacing rather than assuming that centering always produces the best result.
Review the image at a normal viewing size before exporting. Is the subject readable against white? Are any pale edges missing? Are there stray fragments where the original background used to be? Make those corrections first, then export the final image.
Remove BG & Eraser includes 3 free exports and an optional one-time Lifetime Unlock for unlimited use. There is no subscription. You can complete the removal, refinement and background replacement in the same app without a Remove BG account.
Check requirements in the destination separately
For a listing or profile, check the destination's current image requirements before submitting the result. A white background is only one possible requirement; composition, dimensions and acceptable content can also matter. This workflow does not establish passport, visa or ecommerce compliance.
If white feels too stark, the same cutout can be used with another solid color, a gradient or a photo background. If you need a flexible asset for a later layout, use a transparent PNG instead. The guides below explain how the initial background-removal step carries into those other choices.
Related workflows
Try the workflow on your iPhone
Remove backgrounds automatically, refine the cutout and export or replace the background with Remove BG & Eraser.

3 free exports. Optional one-time Lifetime Unlock. No subscription.